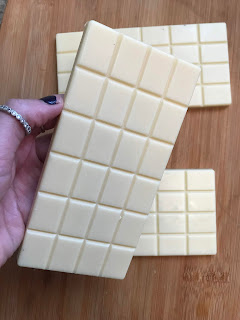
White Chocolate Bars
As I mentioned in my post on Instagram - I will not be taking full credit for this one. This is a mixture of a couple different recipes I found online. Both Maya from Wholesome Yum & The Traveling Pastry Hunter put in the time and effort to work out all the details the first time around, so I wanted to be sure to give them credit.
That being said, I mixed them together due to the ingredients I had, my need for them to be stable at room temp, and possibly a little bit of laziness thrown in for good measure. I am including an "Tools" section this time as well, since I am pretty sure without the immersion blender this would not be as amazing as it is. If you try without it I would definitely be interested to hear how it goes!
TOOLS:
INGREDIENTS:
PROCESS:
That being said, I mixed them together due to the ingredients I had, my need for them to be stable at room temp, and possibly a little bit of laziness thrown in for good measure. I am including an "Tools" section this time as well, since I am pretty sure without the immersion blender this would not be as amazing as it is. If you try without it I would definitely be interested to hear how it goes!
TOOLS:
- Double Boiler (or if you are like me, a pot and a glass bowl)
- Immersion Blender (also called stick blender I think?)
- Chocolate Molds (okay, you can totally line a baking sheet with wax paper and just spread it out there)
INGREDIENTS:
- 170g Cacao Butter (I have used Terrasoul and Anthony's and had luck with both)
- 20g Heavy Cream Powder (Coconut Milk Powder should work if dairy free, but I have not tried this personally)
- 75g Powdered Sweetener (I use erythritol)
- ¼ tsp Liquid Sunflower Lecithin
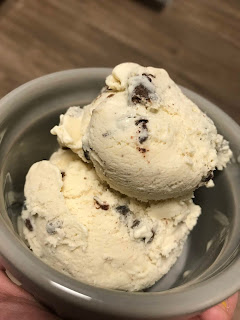
- Flavoring of Choice (I left it out so I could add it to the individual things I was making with the chocolate)
PROCESS:
- Add just a little bit of water to your pot - make sure that the water is not going to touch the bottom of your bowl, and also wipe down the sides of the pot to ensure no water droplets are present where the bowl will be resting. Place your glass bowl on top of the pot of water to serve as your double boiler.
- Chop your cacao butter up into small chunks. I actually chop mine up rather finely. Once you have it all chopped, add it to the glass bowl, and turn the burner on very low heat. You do not want this to boil, and honestly I don't usually even let mine reach a simmering point.
- Stir your life away. Cacao butter takes longer to melt down than regular chocolate, but it will get there. Make sure you are stirring pretty close to the entire time you are trying to melt it down.
- Once fully melted, remove the glass bowl (turn off the burner) from the pot/heat and add in the rest of your ingredients. Just dump them all right in. Mix together thoroughly.
- This is where we grab the immersion blender. You will want to make sure your white chocolate is in a deeper, more narrow bowl. This will allow the blender to really get in there and go to work on the gritty bits.
- Blend for about 30 seconds to a minute, then let the white chocolate cool down for about 3-5 minutes, blend again, let sit, blend again.... you see where I am going with this?
- Once your white chocolate has started to thicken up a tad, and cooled down... you can pour it into your molds. Allow to set up at room temperature.
- Pop out of your molds, admire it's beauty, brag to all your friends. (Oh.. maybe that is just how I react when I have success in the kitchen?)


Comments
Post a Comment