Posts

Showing posts from January, 2019

Air Fried Chicken Drumsticks

Image
This is another super simple meal idea that we recently fell in love with! You can switch this up so many ways - from the seasonings in the breading to the sauce you add on top. The possibilities are endless. (Those are my favorite recipes, if you have not yet learned that about me.) I should also mention that the breading mixture makes way more than you need for 3-4 drumsticks. I simply packed mine back up and used it to bread some veggies and some more chicken the following day. Feel free to half the recipe if you prefer. INGREDIENTS: 4 Chicken Drumsticks  Pickle Juice (enough to cover the drumsticks to brine) 20g Nutritional Yeast (roughly ¼ cup) ¼ cup Parmesan Cheese 1 tsp Garlic Powder Salt to taste (I just sprinkle some in the mix and call it a day) 1 Large Egg PROCESS: Add chicken drumsticks to a bowl (preferably one with a lid) and cover with pickle juice. Cover the bowl and refrigerate for 30-45 minutes. While waiting on the drumsticks, mix together all
Sausage Balls

Image
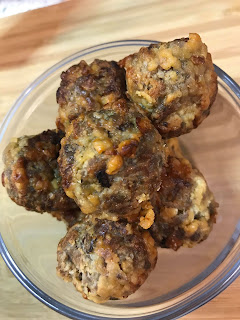
I think there are quite a few recipes out there for delicious sausage balls, but I threw these together last night and honestly shocked myself with how delicious they came out. To be honest, half of the reason I started this blog was so that I could refer back to my own recipes as well. If I don't write them down relatively quickly, they will 100% be forgotten. Not only are these delicious, but they are a breeze to make. In the Air fryer, no less! INGREDIENTS: 16oz Jimmy Dean Sausage (I am sure any ground sausage would work, but if you want specifics..) 2oz Cheddar Cheese, Shredded Trader Joe's 21 Salute Seasoning Salt  Pepper 2 Servings Keto Cornbread (I used some of the Kawaii Treats & Eats corn-free cornbread I had on hand. I am thinking you could whip up some 90 second bread with One on One flavors cornbread drops for the same effect?) PROCESS: Add all ingredients to a medium size bowl and mix together. (You will want to rip the cornbread into small

Sausage Dip

Image
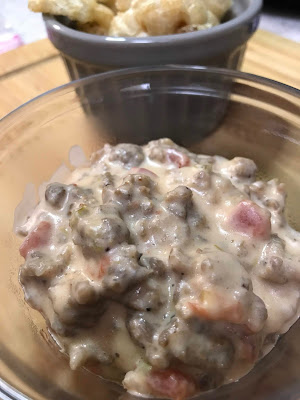
I think everyone has their own version of a good sausage dip, but this is a favorite in our household and I felt I should definitely share it. One of the best things about a good Sausage Dip, is that you can easily tweak little things to make it your own. Hopefully you all enjoy this version as much as we do! INGREDIENTS: 1lb Ground Sausage (we use Jimmy Dean, but feel free to grab a 'cleaner' version) 4oz Cream Cheese (originally we used 8, but to save calories I cut this back and it is equally delicious) 1 Can Rotel (Or any other can of diced tomatoes with green chilis) 3oz Mozzarella Cheese, shredded 2T Maple Syrup (Sugar Free - We use the Smucker's brand for this as it is more of a liquid consistency) PROCESS: Begin by simply browning your sausage over medium heat. Drain the excess fat if you so choose. Once your meat is browned, toss in your can of Rotel. (I have done this with the liquid, and without. It truly boils down the the consistency you are looki

Valentines Day Series: Box of Chocolates | Caramel Coconut

Image
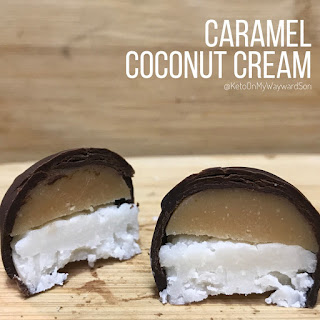
We're back with just the filling ingredients/process on this one. This one is slightly different again. The caramel has to be firm in order to pop them out of the molds, but if you put your chocolate into the refrigerator or freezer it loses it's beautiful shine, so I didn't want to go that route. I thought it would be best to get the fillings all worked out, then cover them lovingly in a waterfall of melted chocolate and hope it didn't all come crashing down around me. To my utter surprise, it worked! Diving in! INGREDIENTS: 38g Caramel (I don't have my own recipe for this one. It is all Paola's creation and it is flawless) 1 tsp Shredded Unsweetened Coconut 2 Tbsp Coconut Manna 2 tsp Heavy Whipping Cream 40g Chocolate (I actually used Lily's this time!) 4 drops One on One flavors "Girly Cookies" (optional, but I was shooting for a Samoa feel) PROCESS: Decide which layer you want on the top of your truffles, this will go into

White Chocolate Bars

Image
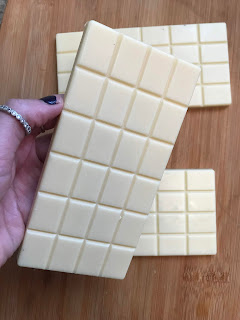
As I mentioned in my post on Instagram - I will not be taking full credit for this one. This is a mixture of a couple different recipes I found online. Both Maya from Wholesome Yum & The Traveling Pastry Hunter put in the time and effort to work out all the details the first time around, so I wanted to be sure to give them credit. That being said, I mixed them together due to the ingredients I had, my need for them to be stable at room temp, and possibly a little bit of laziness thrown in for good measure. I am including an "Tools" section this time as well, since I am pretty sure without the immersion blender this would not be as amazing as it is. If you try without it I would definitely be interested to hear how it goes! TOOLS: Double Boiler (or if you are like me, a pot and a glass bowl) Immersion Blender (also called stick blender I think?) Chocolate Molds (okay, you can totally line a baking sheet with wax paper and just spread it out there) INGREDIENT

Valentines Day Series: Box of Chocolates | White Chocolate Peanut Butter

Image
This one is incredibly simple if you already have white chocolate handy - and my husband thinks they turned out the best! (Strictly speaking of looks, he doesn't like peanut butter. I thought about having him committed since that simply doesn't seem natural to me... but to each their own I suppose.) Diving right in! INGREDIENTS: 40g White Chocolate 2 Tbsp Peanut Butter PROCESS: Chop up your white chocolate into small chunks and melt down. You can do this over a double boiler, but I just use the microwave. Same as the other chocolate melting I have mentioned. Chop finely, microwave for 30 second intervals at 30% power. Stir between each microwave sesh. Once you get it to a stage where most of it is melted and there are just a few chunks left - stir your heart out. Once you get your chocolate fully melted down - you simply mix it into the peanut butter.  Pour this mixture into your molds of choice (hopefully already lined with chocolate) - allow to set up at room

Valentines Day Series: Box of Chocolates | Espresso Ganache

Image
 I am trying my best to get all of the variations up on the blog for you guys as soon as possible. I am thinking the best way to go about this is to just give you the details for the fillings themselves, and then you can refer back to one of my previous posts for the chocolate work. Hopefully I can get it all in one location for you after I finish up all of the filling posts. In the meantime - bear with me? Okay, moving right along. We're going to dive into the Espresso Ganache this morning! This particular mixture filled about 4 chocolates for me, but feel free to double the recipe if you plan to make a big batch! (It is super simple, I promise) INGREDIENTS:  37g Chocolate Ganache (mini step-by-step at the end of the post) ¼ tsp Espresso Powder ¼ tsp Water PROCESS: Make sure your ganache is at least at room temperature so that it can be easily mixed. In a separate bowl, add the espresso powder to the water and mix together thoroughly. (It may seem a little odd sin

Valentines Day Series: Box of Chocolates | Blueberry Pancake

Image
Round Two: Still a 'test' batch of sorts, but it was delicious so I wanted to share. The reason I say test, is due to the sweetness level. I find these to be slightly sweeter than I would like. The issue is that the powdered erythritol is used to thicken the inside up enough to have it set up in the molds. (Otherwise popping them out is a real issue - trust me) This time around, we will be making the filling, then covering them with chocolate. I have tried this the other way around and out of a batch of 6 chocolates, only 2 came out of the mold un-squished. The filling is not solid enough to withstand the force I was putting behind getting them out of the molds. I would still note that I do not yet have specific weights for the chocolate. I made a full batch from scratch, so I don't have comparison weights for your favorite bar/chips. You can create your own batch, or grab your favorite brand and melt as needed to fit your molds. I would recommend melting down more th

Valentines Day Series: Box of Chocolates | White Chocolate Strawberry Lindt Truffle

Image
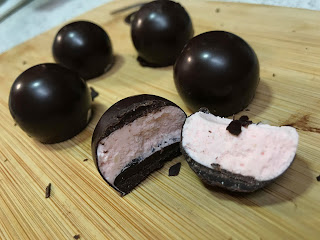
Well, if you guys are not new here - you know how terrible I am at keeping up with this blog. My intention this year is to get better at the upkeep, and eventually clean the blog itself up to be slightly easier to navigate. In the meantime, I want to make a Valentine's Day series. I am not one to really celebrate the holiday itself, but any excuse to play with a theme in the kitchen - I am all over. The first thing I wanted to tackle, was the traditional chocolate box!  So far I have managed to create my own take on the Strawberries & Cream Truffles by Lindt. You know the ones. They make their appearance for every holiday, and Valentine's Day is no exception. So far 'my recipe' is really just a mish-mash of recipes my favorite bloggers have created. I simply smashed them all together into this lovely little specimen. I would also note that I do not have specific weights for the chocolate. I made a full batch from scratch, so I don't have comparison

Swiss Meringue Buttercream (No Heat!)

Image
Okay, so this is definitely a 'cheat' version of Swiss Meringue Buttercream, but I have tried it the long tedious way as well and this honestly came out better. I think it is due to the erythritol granules not dissolving properly when heated (at least not the same way regular sugar would)? Every time I tried to do this over the stove it felt like my arm was about to fully fall off my body before I got it to the stage I was looking for. That is when I set out to find a recipe for SMBC that did not involve that much of a workout. I stumbled upon this recipe , and decided to tweak it a bit to fit my sugar-free needs. Lets dive in! INGREDIENTS: 1 Egg White (or the equivalent in cartoned egg-whites - about 2T) ½ Cup Powdered Sweetener (I just 'blitz' some granular erythritol until it is powdered, then measure out) 150g Butter, Softened (About 10T + 2t - I use sweet cream butter, as always) 1tsp Vanilla (or flavor additive of choice. One on One Flavors work a

Quick Cream Cheese Glaze

Image
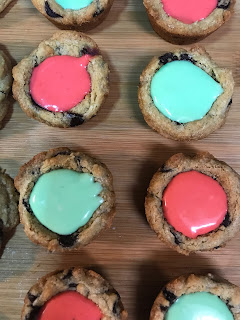
I'm Back! I am sure you know by know how terrible I am at keeping up with these posts... I'm trying, I promise! This will be a quick, 'straight to the post' post. You guys asked for it, so here it is! This was a spur of the moment glaze I whipped up - specifically so I could add holiday colors and make my cookies look a bit more festive without too much effort. I'll call it a success! Bonus? It tastes good and barely alters the macros of the cookies as a whole. It seems like a fairly small batch, but it glazed 20 cookies for me with leftovers. (Which I may or may not have scooped out of the bowl with my finger to enjoy alllll by itself) INGREDIENTS: 1.5oz Cream Cheese 2Tbsp Heavy Whipping Cream 1Tbsp Unsweetened Cashew Milk Erythritol/Stevia to taste Flavors/Coloring to taste THE PROCESS: Soften the cream cheese (if not already softened) by microwaving on low power (30%) for 10-15 seconds bursts. Should be soft, but not melted. Add the HWC &