Valentines Day Series: Box of Chocolates | White Chocolate Strawberry Lindt Truffle
Well, if you guys are not new here - you know how terrible I am at keeping up with this blog. My intention this year is to get better at the upkeep, and eventually clean the blog itself up to be slightly easier to navigate.

In the meantime, I want to make a Valentine's Day series. I am not one to really celebrate the holiday itself, but any excuse to play with a theme in the kitchen - I am all over. The first thing I wanted to tackle, was the traditional chocolate box!
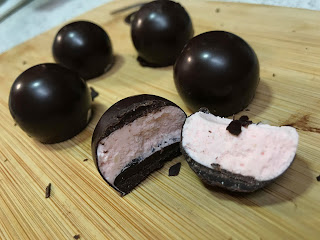
So far I have managed to create my own take on the Strawberries & Cream Truffles by Lindt. You know the ones. They make their appearance for every holiday, and Valentine's Day is no exception. So far 'my recipe' is really just a mish-mash of recipes my favorite bloggers have created. I simply smashed them all together into this lovely little specimen.
I would also note that I do not have specific weights for the chocolate. I made a full batch from scratch, so I don't have comparison weights for your favorite bar/chips. You can create your own batch, or grab your favorite brand and melt as needed to fit your molds. I would recommend melting down more than you think you need as opposed to less. You can always let it harden and reuse it later if you don't need it all now - re-melting chocolate half way through is quite annoying. haha
I would also note that I do not have specific weights for the chocolate. I made a full batch from scratch, so I don't have comparison weights for your favorite bar/chips. You can create your own batch, or grab your favorite brand and melt as needed to fit your molds. I would recommend melting down more than you think you need as opposed to less. You can always let it harden and reuse it later if you don't need it all now - re-melting chocolate half way through is quite annoying. haha
Time to dive in!
INGREDIENTS:
- Chocolate (I made my own from this recipe to save money. I use Heavy Cream Powder and Dutch Process Cocoa Powder. If you want lower maintenance - you can definitely melt your favorite brand of sugar free chocolate for this portion)
- 65g White Chocolate
- 20g Butter
- 20g Heavy Whipping Cream
- Red/Pink Food Coloring
- Strawberry Flavoring to taste
PROCESS:

- First thing first: The chocolate. If you are making it from scratch, pull up your favorite recipe (this is mine) and get to it. If you are using your favorite chocolate bar - melt it down by chopping into chunks and microwaving at 30% power for 30 seconds at a time, stirring in-between. Once you get it mostly melted with a few chunks left, stir your little heart out until it all melts down. As Mary Berry says (roughly) "Chocolate melts in a small child's hand". Even if you think the chocolate isn't warm enough to melt the remaining chunks, I assure you that it is!
- Coat Your Molds. I have found the easiest way to do this is to pour a good amount of the melted chocolate into the molds and then tilting it every which way until the full mold is coated. (You want to form a shell for your chocolates) Once the entire outer layer of chocolate is complete, turn your mold over on top of your bowl of chocolate and let the excess run out. Feel free to tap around on the bottoms of the mold a bit to rid any bubbles and really get the extra chocolate out. Set mold aside to set up. (Be sure to reserve some chocolate to 'close' the chocolates off at the end)
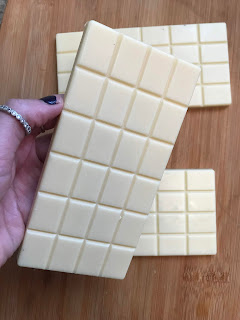
- Make Your Filling. For this particular filling, we need to melt down some more chocolate. White chocolate this time. I made this one from scratch as well (this is my favorite recipe, although I did tweak it slightly. I will post my version eventually), but if you have a store bought version of sugar free white chocolate feel free to use that. This time we will do so in a ganache fashion.
- Heat your heavy whipping cream on low heat until just under boiling/simmering. Pour the warm HWC over the white chocolate and let sit for a minute or two. Stir mixture together until it comes together into a smooth consistency. Set Aside.
- Whip the Butter. Add your softened butter to a small bowl and beat with a hand mixer until lighter and fluffy.
- Add your flavoring and food coloring into the whipped butter. Then fold the butter into the ganache mixture.
- Fill Your Molds. At this point, your chocolate shells should be set up (if not, you should wait until the chocolate is solidified inside of the molds) Distribute the ganache filling among your molds. Be sure to leave room to add a final chocolate later on top of the filling to 'close' off your chocolates. Set aside to allow the filling time to set up a little.
- Finish the Chocolates. The last step! All we have to do now is take a bit more of the melted chocolate, and pour it on top of the filling. Make sure you fill your molds to the top, and then scrape a knife or spatula across the top to remove any excess chocolate and leave a smooth 'bottom'.
- Remove & Enjoy! Now all you have to do it turn out your molds once the final layer of chocolate it set up. If all goes according to plan, this particular truffle will not give you issues. It is solid enough to use whatever force needed to get that sucker out of there. haha It should also be perfectly solid at room temp, so you do not have to worry about them melting all over!


Comments
Post a Comment